I've been getting planning done in our "off time." And, now have the preschool month of January planned out. I'm going to share these plans with the blog world. Some of you can follow along, or just pick and choose an activity that looks good to you! Also, there is no telling if we will actually get to all of these activities....school is hit or miss with Three. Some day's he is SO into it, and will sit and do EVERYTHING I suggest. Other day's I'm lucky if he's interested for 5 minutes. The plan is a working draft of sorts. This is what I'd *LIKE* to do this week. I'll post a post-week picture entry and let you know how much we ACTUALLY get done. I throw that out there so you don't look at this plan and feel intimidated, and not give it a try. Just do what your kid is interested in, and what you think will be fun, and forget the rest!
This week's theme will revolve around the book "The Snowy Day"
Read “The Snowy Day”
Make a prediction about why the snowball did not last.
Since we had Christmas snow (and lots of it) I'm going to put away different sized snowballs (freezer) to take out and compare melt times based on size during this unit. If you don't have snow....you could freeze varying amounts of water in paper cups, and then see how long it takes different amounts of water to melt.
Sensory ideas: Instant potato flakes, vanilla pudding, ice cubes, white pom-poms, cotton balls
I love this idea, but I'm afraid I didn't prepare early enough for this. I will start now though, and since my week 2 plans also have to do with cold weather, I can use it then. Collect empty clean milk cartons paint them white and use them as ice blocks to build an ice fort. I can see Three and Four totally loving playing in an indoor ice fort. I can also see my big girls really enjoying building different forts for them to play in.
Make some paper snowflakes. Discuss how every snowflake is different. Look at snowflakes through a microscope on this site: http://www.guardian.co.uk/science/gallery/2009/jan/07/1
Use snowflake stampers to make a snowflake scene.
Use doll sized shoes to make “drag marks” in shaving cream snow.
For snack:
http://mama-jenn.blogspot.com/2010/01/edible-tortilla-snowflakes.html
Snowman pancakes: different sized pancakes, raisin eyes, fruit buttons, orange slice for a mouth, sprinkle with powdered sugar "snow"
Make marshmallow snowmen! (if you get them damp they stick together!)
Powdered sugar doughnut holes--edible snowballs!
Have an indoor “snow ball” fight. Either with cotton balls, or balled up newspaper.
Sequencing: Building a snowman cards.
Make snowflake from pipe cleaners and beads…use it as a patterning exercise.
Rhyming words (or whatever skill you are working on: item/numeral match, upper/lower case letter match, etc.) snowmen: a different rhyming word on each part of the snowman, make self correcting with a different color on the back of each.
Talk about all the types of clothes we wear in the snow.
Glue together this snowman: http://www.eslkidstuff.com/Worksheets/snowmancraft.gif
Snowflake stickers counting book. Make a book and put the numerals that you are working on (1-10, or skip counting, whatever!) at the bottom of each page. Have the child peel and stick the right number of snowflake stickers to each sheet. (I have yet to get snowflake stickers, but I do have snowflake stampers, and I may just use that. I do have to make a trip to the store....so I may get snowflake stickers if I can find them.)
Song: (sung to tune of "Are You Sleeping"
"It is snowing, it is snowing,
On my head, on my head
I need a hat, I need a hat,
On my head, on my head"
Vocabulary: As you sing name the body part in the above song, let the children pick out the correct article of clothing to finish the verse. For example, if you say feet...they would pick boots.
Glittering Snowballs (I'm going to be honest...I like this idea in theory...but I'm honestly not sure I'm going to make these. But I share in case you in the blog world are braver than I.)
What You Need:
Balloon
Glue
Yarn
Glitter
What You Do:
Blow up a small balloon for each child.
Have them dip yarn pieces into a mixture of glue and water.
Then have them put the yarn over the balloon. Have them do this until the balloon is mostly covered. Finally,pour glitter over the balloon and let dry. When it is dry you can pop the balloon and remove it. These are fabulous snowballs for a winter theme.
We'll be talking about letter S, as well. We will have a scavenger hunt around the house for S items and add them to our alphabet book. We'll learn about snakes, and where snakes are in the winter. We'll make a S-snake craft, and visit the museum to look at some snake skin.
Practice finger writing letter S in shaving cream, instant potatoes, or other sensory medium.

Wednesday, December 29, 2010
Monday, December 13, 2010
Another Christmas Craft and Random Cuteness
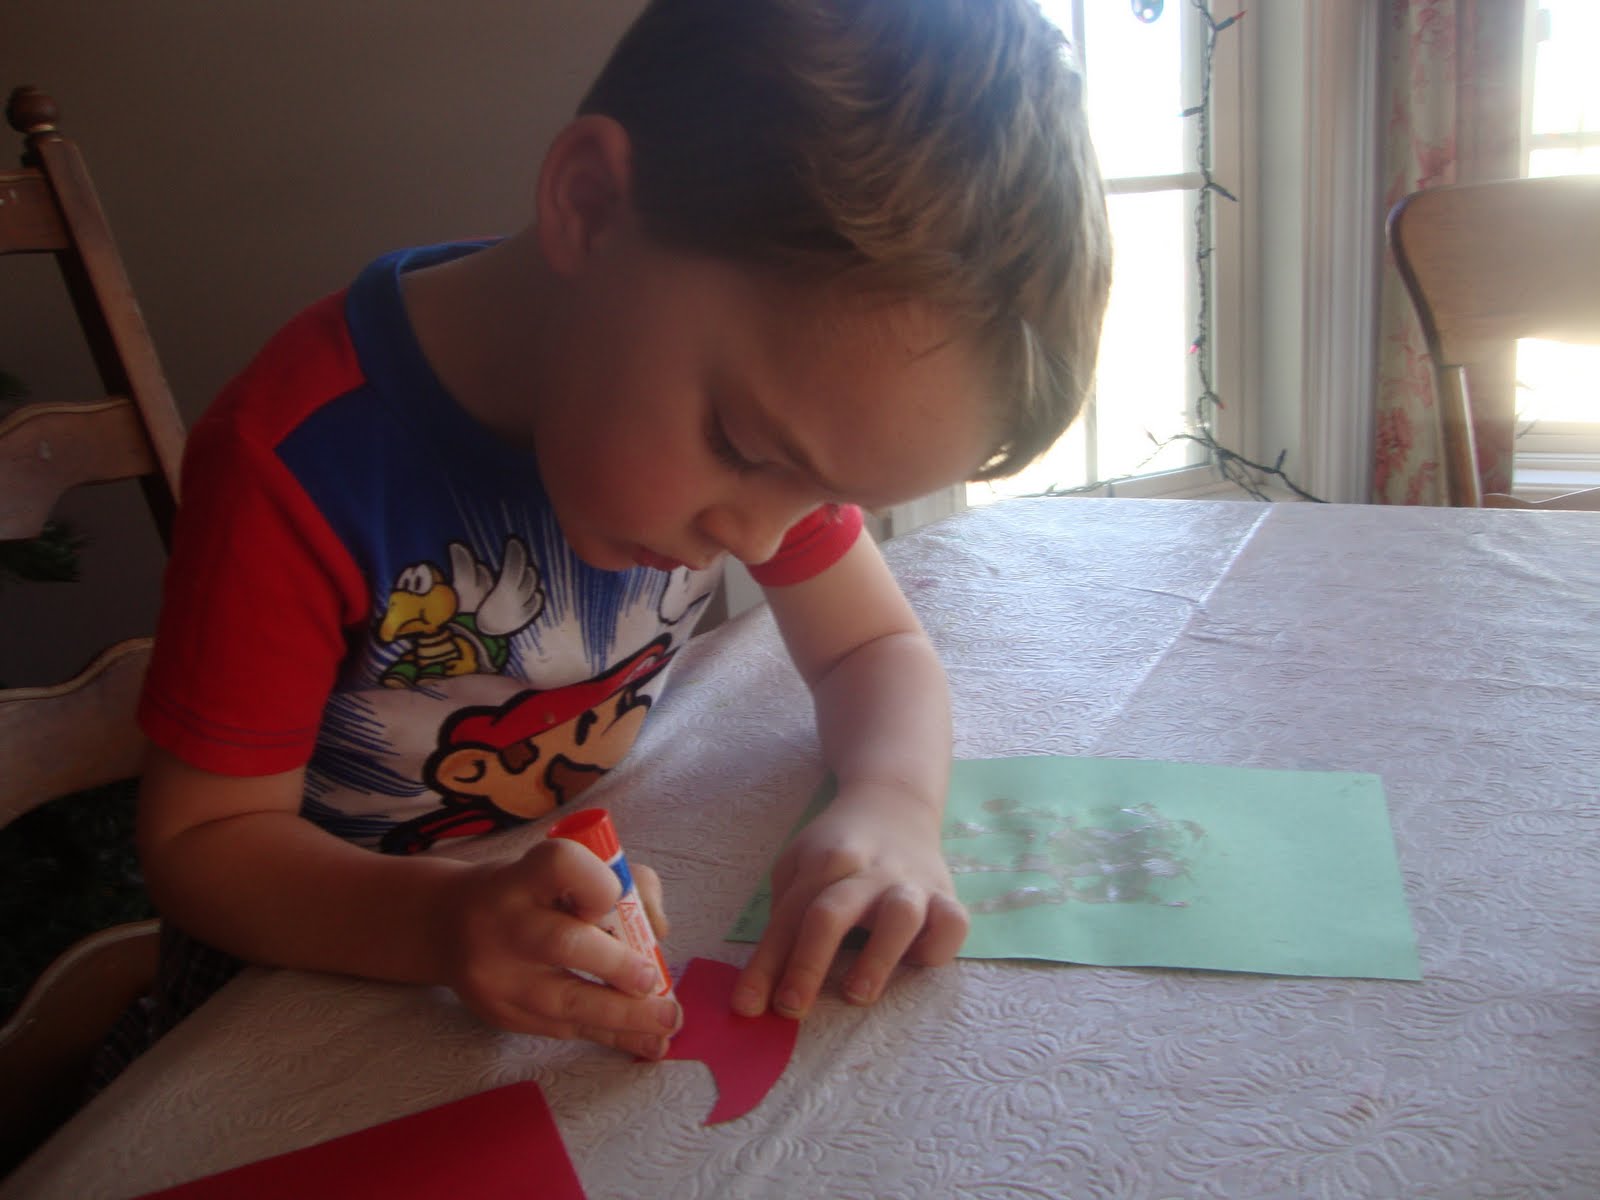
This craft is one I modified from this link: http://yellowmums.blogspot.com/2010/12/must-be-santa.html
Instead of doing it on tile, I used green construction paper. Green card stock would have worked better, but all I had was red and white.
Step 1: Paint child's hand white (or have them paint it themselves...Three painted his own, I painted Four's for him.)
 Step 2: Press hand onto paper/cardstock/tile. Sorry the pic is blurry, I was trying to press his hand AND take the shot...and he was probably moving to boot!

Step 3: We used the red cardstock instead of red sticky backed felt. Cut out a santa hat shape, and glue it on.

Step 4/5: We used beans for eyes because I couldn't find our googly eyes...I'm not sure if we used them all or I just misplaced them. Either way...the beans worked ok. They were hard to stick though because they were small. Larger beans would have rocked. Then we added cotton "fur" trim to the hat, and a ball on the end.

Three's finished project:

Random cuteness abounds!
Instead of doing it on tile, I used green construction paper. Green card stock would have worked better, but all I had was red and white.
Step 1: Paint child's hand white (or have them paint it themselves...Three painted his own, I painted Four's for him.)
 Step 2: Press hand onto paper/cardstock/tile. Sorry the pic is blurry, I was trying to press his hand AND take the shot...and he was probably moving to boot!
Step 3: We used the red cardstock instead of red sticky backed felt. Cut out a santa hat shape, and glue it on.
Step 4/5: We used beans for eyes because I couldn't find our googly eyes...I'm not sure if we used them all or I just misplaced them. Either way...the beans worked ok. They were hard to stick though because they were small. Larger beans would have rocked. Then we added cotton "fur" trim to the hat, and a ball on the end.

Three's finished project:

Random cuteness abounds!
Three's first experience with hot chocolate, after the first snow fall of the season (which was only about an inch, and didn't stick but was still SO exciting!) Luck of the draw managed to capture this priceless face!

We had snow last year, but Four was only 6 months old, so it was still a whole new experience for him. I <3 snowflakes on eyelashes (yes, these are a few of my favorite things.)
 The same day as the snow, was the day of our town's Christmas parade. One danced in the parade with her dance company. Here are Two, Three and Four waiting on the curb for the parade to begin.
  And, here is One in the parade!


We had snow last year, but Four was only 6 months old, so it was still a whole new experience for him. I <3 snowflakes on eyelashes (yes, these are a few of my favorite things.)
 The same day as the snow, was the day of our town's Christmas parade. One danced in the parade with her dance company. Here are Two, Three and Four waiting on the curb for the parade to begin.And, here is One in the parade!
Saturday, December 4, 2010
Christmastime Crafts AND Baby "School"
Santa craft. One did this project with Three while I was at a doctor visit with Four. It's a piece of white printer paper, a piece of red construction paper and cotton balls. :)
 I picked up this reindeer mask for Three at the craft store (for $1,) they had reindeer and snowmen, he picked the reindeer and was SO excited to paint it.

 Three wanted to play with this too when I broke it out this week (it's been awhile since he's done this activity,) so when he was done with his own stuff he sorted the chips by color and then put them in the container.
 Transferring with a spoon: Two bowls, a large spoon and whatever medium you would like to transfer. We chose pom poms. Put the poms in one bowl and demonstrate how to move them to the other with the spoon. In this picture the spoon was in use, and blurry, my apologies. But you get the gist!
 For this activity, he has a crunchies container that I cut a square hole in the lid of, and a bowl of poms. He takes the poms from the bowl and pushes them through the hole in the lid.
 This is a great activity. This is the first time he's done this one, and he really liked it. You need an empty spice container (the kind with the "sprinkle" holes in the lid,) and toothpicks. I had to lay the toothpicks out one by one, because he doesn't have the motor skills yet to pick up just one from the pile. But, working on this type of thing will help build those. He took one toothpick and pushed it through one of the wholes in the lid of the spice container. He tried it two different ways, in his lap and flat on the table. In his lap was much easier.


 I picked up this reindeer mask for Three at the craft store (for $1,) they had reindeer and snowmen, he picked the reindeer and was SO excited to paint it.
Baby "school":
Four has begun really wanted to do things when Three and I are doing school. So, I've had to break out his own school things.
This is poker chips (picked up from Dollar Tree) and an empty wipe container with the slot in the top. Four takes the chips and slides them through the slot that you pull the wipes through.
Three wanted to play with this too when I broke it out this week (it's been awhile since he's done this activity,) so when he was done with his own stuff he sorted the chips by color and then put them in the container. Transferring with a spoon: Two bowls, a large spoon and whatever medium you would like to transfer. We chose pom poms. Put the poms in one bowl and demonstrate how to move them to the other with the spoon. In this picture the spoon was in use, and blurry, my apologies. But you get the gist!
 For this activity, he has a crunchies container that I cut a square hole in the lid of, and a bowl of poms. He takes the poms from the bowl and pushes them through the hole in the lid.
  This is a great activity. This is the first time he's done this one, and he really liked it. You need an empty spice container (the kind with the "sprinkle" holes in the lid,) and toothpicks. I had to lay the toothpicks out one by one, because he doesn't have the motor skills yet to pick up just one from the pile. But, working on this type of thing will help build those. He took one toothpick and pushed it through one of the wholes in the lid of the spice container. He tried it two different ways, in his lap and flat on the table. In his lap was much easier.

Thursday, December 2, 2010
Oh What Fun...
I made this first item because Three asks EVERY DAY how many more "night nights" until Christmas??? This will be something he can do every day, and see how much longer he has. I picked up some Xmas stickers at A.C. Moore (a craft store) for .75. I got out a piece of red construction paper, and used one of the stickers as my guide. I then traced the sticker 24 times, and added a Merry Christmas for Christmas day.
Countdown chart:
 December 1 kicks off the season of giving! The first gifts are always new ornaments for the tree.
 Three helps Daddy put up the tree!

Seriously, if Four were any cuter, his life would be in constant danger because I could just eat him! This is the first time he's helped me in the kitchen, and he was "sneaking" a taste!

Countdown chart:
 December 1 kicks off the season of giving! The first gifts are always new ornaments for the tree.
 Three helps Daddy put up the tree!
Seriously, if Four were any cuter, his life would be in constant danger because I could just eat him! This is the first time he's helped me in the kitchen, and he was "sneaking" a taste!
Our elf, Rudolph, arrived the day after Thanksgiving!
 3rd location where Rudolph was found!
 A pinecone craft, Four wanted in on the action.
 Painting the pinecone with white paint, to give it a snow affect:

Adding glitter:

One sparkly pine cone!

3rd location where Rudolph was found! A pinecone craft, Four wanted in on the action. Painting the pinecone with white paint, to give it a snow affect:
Adding glitter:

One sparkly pine cone!

Subscribe to:
Posts (Atom)